Note: To connect to a secured network you must create a profile.
Step 1 Open the utility by double clicking on the icon in the system tray.
![]()
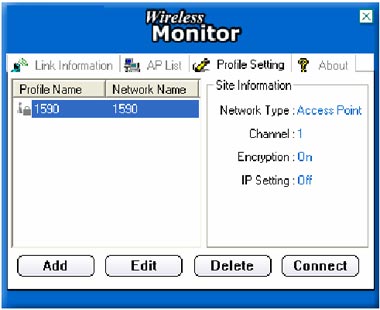
Step 2 Click on the "Profile Setting" tab then click "Add".
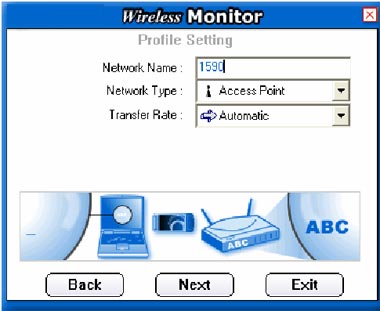
Step 3 Enter in the SSID of the network that you want to connect to in the "Network Name" field and click "Next"
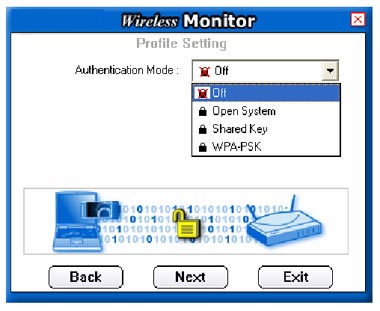
Step 4 Choose the authentication mode that is being used on the access point that you are connecting to and click "Next".
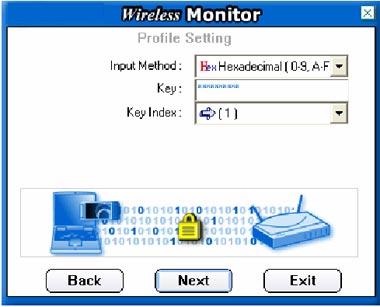
Step 5 Enter the security parameters defined by the access point you are connecting to and click "Next."
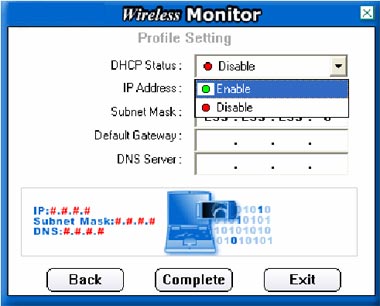
Step 6 Enable the IP Setting and click "Next".
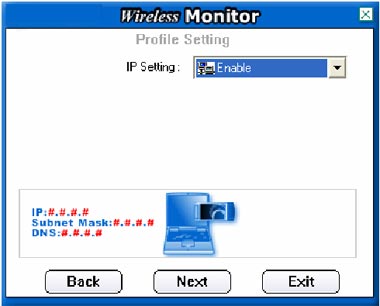
Step 7 Enable DHCP and click "Complete" if you are using a dynamic IP address. If you are using a static IP address, disable DHCP and manually enter the desired IP address, subnet mask, default gateway and DNS server addresses.