Step 1 Go to Start>Settings>Printers>Add
New Printer (WinXP - Start>Printers and Faxes>Add
a Printer).
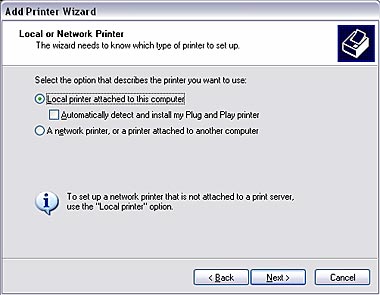
Step 2 Select Local Printer. Make sure to uncheck Automatically
detect and install my plug and play printer. Click Next.
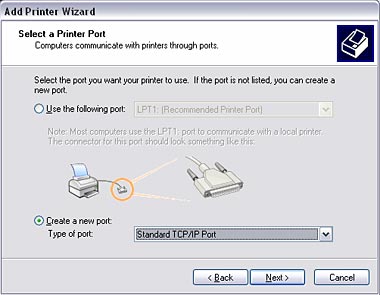
Step 3 Select Create a New Port and select Standard TCP/IP port. Click Next.
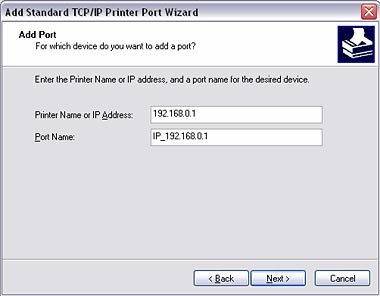
Step 4 Enter the IP address of the Router (192.168.0.1). Leave the port name with the default name. Click Next.
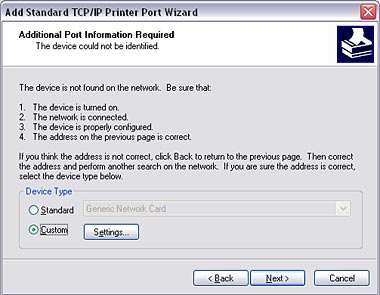
Step 5 You will get a message saying that additional port
information required.
Step 6 Select Custom and then click Settings.
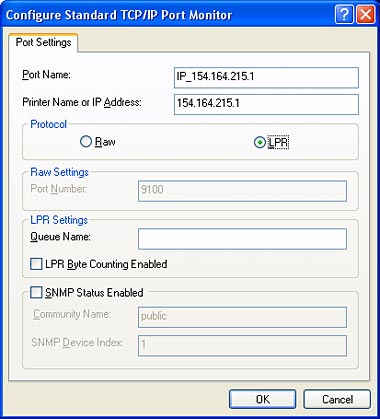
Step 7 Set Protocol to LPR.
Step 8 For the LPR Settings for the TEW-P1UG
the Queue Name will be U1. It is case sensitive! In most cases, check LPR
Byte Counting Enabled. If you cannot print, then try unchecking this.
Step 9 Select OK > Finish.
Step 10 Continue with the Add Printer Wizard.
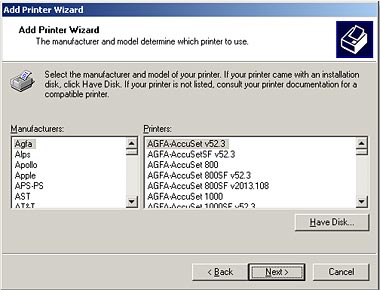
Choose your printer from the list or click Have Disk and point
to your printer driver disk.