NOTE: The following example is using a TEW-432BRP wireless Router with the TV-IP201 (w). In this example, we have change the IP address of the camera to 192.168.1.20 and the default gateway as 192.168.1.1
Step 1 Log into the Router by entering its IP address into a browser. The
default IP address is https://192.168.1.1.
At the login, enter your username (admin) and password (admin).
Step 2 Click "Status" on the left hand side then scroll down
to the "WAN" section and write down the "public" IP address and
the DNS address .

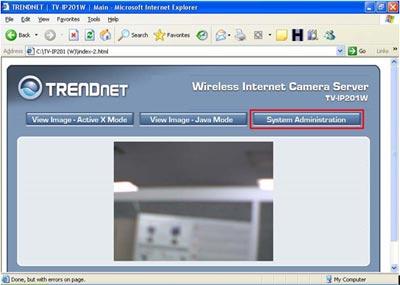
Step 3 Open your web browser and type the IP address of the TV-IP201 (w) in the address bar. The default IP address is 192.168.1.30.
Step 4 Next, Click on "System Administration".

Step 5 Click "Network" on the left hand side.
Step 6 Make sure that the IP address is on the same subnet as the Router.
In the example we used the IP address of 192.168.1.30 and the Default Gateway
of 192.168.1.1, which is the gateway to the TEW-432BRP. We also used the DNS
address that we found on the Routers status page.
Note: If more than one DNS
address was listed on the Router, input that number in as well.

Step 7 Log back into the Router by entering its IP address into a browser. The default IP address is https://192.168.1.1. At the login, enter your username (admin) and password (admin).
Step 8 Click on "Access" on the left hand side of the screen and then on Virtual Server on the top banner.
Step 9 Now click on "Enable", fill in the Name, next, you will use TCP for the Protocol, input Port 80 for both the Private and Public port, and the IP address of the Camera (in this case, we used 192.168.1.30) and then click "Add".

Step 10 Now from a remote location open your browser. In the address bar, input the "public" IP address from the Router. In this case, https://216.109.112.135 and it will bring up the "Main" screen of the Camera.
Note: If you are still unable to access the cameras remotely please check the following.
- Please make sure the proper gateway address is entered. This will be your Router's LAN IP Address.
- Please make sure the proper DNS servers are entered. You can find this information on your Router's status page. If that information is not available on your Router's status page please contact your ISP for your DNS server addresses and enter them.
- How do I reset my TV-IP201 (w) back to factory defaults?
- How can I view the TV- IP201 (w) remotely if it’s behind a router or firewall?
- How do I upgrade the firmware of my camera?
- How do I configure my TV-IP201 (w) series cameras to upload snapshots to an FTP server?
- How do I view the TV-IP201 (w) image using IPView Pro?